I have been invited to be a guest contributor at the Brink of Freedom blog. I submitted my first article there. Please check it out if you have time.
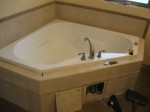
… and it works! Oz, the oldest boy and I set the tub in place… After Oz finished the plumbing, we were very pleased that it works well and does not leak! 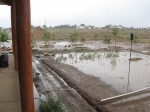
Just a few photos of the beautiful rain we are getting here… Rain… So glad we have gravel… Backyard… can you say natural swale? The trees love it. 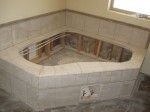
We’ve begun learning to put in the tilework. The first project was the surround for the garden tub. We opted for a fairly neutral color of tile (Briton Bone Home Depot) with accent pieces that coordinate with the stained concrete floor color (Walnut). We chose a grout color of Linen. Here are a few photos… Tub Surround Rope trim Travertine borders […] 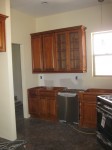
We opted to put RTA (Ready-to-Assemble) cabinets in the house that we purchased from mycabinetplace.com. As I mentioned in an earlier article, the quality of the RTA cabinets is very good, but with huge savings when you assemble them yourself. I documented receiving the cabinets, but realized this morning I had failed to post about assembling and installing them in the house. We have learned a few things as we passed this milestone that might be helpful to others: 1. The instructions are only a rough idea of what to do… The hardware mentioned on the instruction sheet may or […] 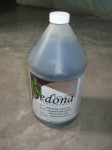
Applying the acid stain I’ll admit it… it took the wind out of our sails to have to scrub paint off of the entire floor surface of the house. We did it, though, and were very happy with the products we bought at thestampstore.com. This time, we tested a small area of the laundry room floor (the part where the washer and dryer will sit) before staining the entire house. After we did this, we were able to gauge how dark the stain would be and whether or not we had cleaned the floors of the paint (Valspar […] 
Well, since we finished scrubbing all the paint off the floors, we had to wait for delivery of the new products from thestampstore.com. We ordered: Walnut Acid Stain 2500 Floor Sealer 3000 Floor Sealer Cherry Wax Cherry Wax Applicator – Wooster 12″ Lambswool. They all finally arrived on Wednesday or so… We were already in the midst of the next project, though, so we continued on with the irrigation system. Since last May we’ve had a temporary watering system set up for the four pecan, one peach and one nectarine tree that are all planted northeast of the workshop. The […] 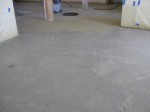
Ok… we have this post as a warning to other would-be concrete floor stainers. We have effectively discovered nearly everything not to do. Before we began the process, we had looked around online and in local stores to find good products to use. During our visit at the Lowe’s in Carlsbad, the paint dept. manager convinced us that their Valspar products would work very well on our house interior. Well… the etching product seemed to work fine, so we thought all was good. Yesterday morning, with plans for an easy day, we began early spraying the “stain” on the […] 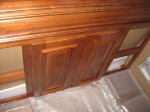
As I mentioned in a previous article, Discount Kitchen Cabinets, RTA (Ready to Assemble) cabinets are a cost-effective way to get good quality cabinets at a much lower cost. We ended up ordering our cabinets online from myCabinetPlace.com, a company out of Minnesota. After checking and double-checking final measurements for Kitchen, Laundry, Master Bath, Two bathrooms for the boys and the Powder bath, I made a call and spoke to a very nice and helpful person (with a definite Minnesota accent) at the company phone number. He answered all my questions about specific details and what he could offer for […] 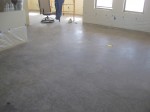
We decided early on that we wanted to have stained concrete floors throughout the bottom level of the house. For one thing, the finish is beautiful and durable. For another thing, we really do not like wall-to-wall carpeting at all. Lastly, it is a very low-cost alternative to ceramic tile and easy to do relative to other alternatives. To prepare for this, we asked our concrete guys to give the foundation a machine finish after it was poured. It has a very nice glassy finish already on most of the house (along the edges of the foundation, there are a […] |