A sample text widget
Etiam pulvinar consectetur dolor sed malesuada. Ut convallis
euismod dolor nec pretium. Nunc ut tristique massa.
Nam sodales mi vitae dolor ullamcorper et vulputate enim accumsan.
Morbi orci magna, tincidunt vitae molestie nec, molestie at mi. Nulla nulla lorem,
suscipit in posuere in, interdum non magna.
|
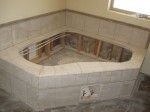
We’ve begun learning to put in the tilework. The first project was the surround for the garden tub. We opted for a fairly neutral color of tile (Briton Bone Home Depot) with accent pieces that coordinate with the stained concrete floor color (Walnut). We chose a grout color of Linen. Here are a few photos…
Tub Surround
Rope trim
Travertine borders
[…]
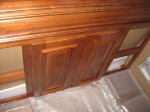
As I mentioned in a previous article, Discount Kitchen Cabinets, RTA (Ready to Assemble) cabinets are a cost-effective way to get good quality cabinets at a much lower cost. We ended up ordering our cabinets online from myCabinetPlace.com, a company out of Minnesota. After checking and double-checking final measurements for Kitchen, Laundry, Master Bath, Two bathrooms for the boys and the Powder bath, I made a call and spoke to a very nice and helpful person (with a definite Minnesota accent) at the company phone number. He answered all my questions about specific details and what he could offer for […]
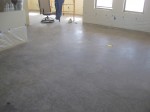
We decided early on that we wanted to have stained concrete floors throughout the bottom level of the house. For one thing, the finish is beautiful and durable. For another thing, we really do not like wall-to-wall carpeting at all. Lastly, it is a very low-cost alternative to ceramic tile and easy to do relative to other alternatives.
To prepare for this, we asked our concrete guys to give the foundation a machine finish after it was poured. It has a very nice glassy finish already on most of the house (along the edges of the foundation, there are a […]
Here is a YouTube vid of a quick walk-through of the house.
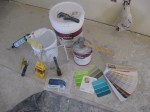
Now that the entire house is primed, we are preparing for the rest of the paint project. However, here are a few tips about the priming phase:
1: Especially when using a big pump sprayer, you will want to dilute the paint a bit for priming. To do this, you need a couple of empty 5-gallon buckets (no problem, since we did our own mudding and taping). Using the buckets, you will add 2 gallons of water for each 5 gallon bucket of primer. You will pour the water and paint back and forth, mixing the paint and water until […]
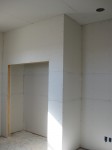
As of Wednesday (May 1st), we have the entire house completely textured and primed…
Pantry Walls Textured and primed
A few notes about mudding and taping and texturing. We found the buckets of Joint Compound (green mud) to be very convenient to use for banjoing and the first coat of mud. Mixing it well (and adding no water at all) was the key to smooth mud for the banjo and also for using to apply the first coat to screw heads and seams. Early on, we tried adding a bit of water to the mud to make […]
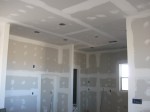
We have been working on the next part of the drywall experience the past two weeks. We began on our own in the garage (which was a good thing). Then, starting on Feb. 28th, we had the help of a professional to get things done right in the main living area of the house. In the past 7 workdays, we have made pretty good progress.
We began with patching the heads of the screws on all the sheetrock panels using “green” mud, also known as all-purpose joint compound. Apparently, this stuff is harder (and more difficult to sand) and is […]
Bedroom sheet rock
We began hanging sheet rock on the walls. Thankfully it is much quicker than doing the ceilings, with the exception of interior closets. They seem to slow the process down with the many smaller sections and cuts. Using the Roto-Zip tool on the wall edges, door and window frames saves the heartache of making exacting measurements on the edges. In those areas I simply add a bit of overhang and zip the excess off. Many of our walls are slightly less than 12′ wide, so the need to match edges along a 1 1/2″ edge was […]
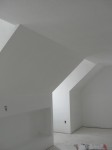
We’ve been learning as we go on so many different things during the home construction. Sheetrocking has been another. We just finished sheetrocking the ceilings of the entire house, in preparation for attic insulation.
Since the ceilings are all 10 feet tall, we knew before we ever began that we needed a lift for the sheetrock. In the fall, Oz found a good price on a sheetrock lift that has proved very valuable.
Based upon the recommendation of our contact at the local building supply store, we went with 4′ x 12′ sheets, rather than 4′ x 8′ […]
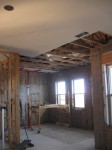
Several tasks had to be completed before the insulation could happen. They were:
Electrical rough-in (subcontractor) HVAC rough-in (subcontractor) Plumbing top-out (Oz) Security system wiring (Oz and the boys) CAT-6 Internet cable wiring (Oz and the boys) Blocking for installation of brackets/handrails, etc. (Oz) Final installation of woodburning stove and chimney (Oz)
During the past month, all these things have been accomplished. So… we got started on placing insulation on the wall sections. We used R-19 batting for the exterior walls and R-13 for the interior insulation for the pantry. We insulated between the living area and the bedrooms (R-19), […]
|
|